Your Christmas Tree Is Content: How to Style an Artificial Tree That Actually Photographs Well
Here is something nobody tells you until you are standing in your living room at eleven at night with a ring light and a growing sense of despair: a tree that looks beautiful in person can photograph absolutely terribly.
The lights blow out. The branches read as a dark green blur. The baubles catch the flash and turn into white dots. And the tree that took you four hours to decorate looks, on camera, like a vaguely festive bush.
If December is a big month for your content, your tree is not just decoration. It is a set. And sets need to be built differently from the things we put up purely for ourselves.
Why Artificial Wins for Content
Real trees are gorgeous and they are a nightmare to shoot. They drop needles that show up on every surface in every photo. They change shape over the month. They droop in warm rooms. And if you are filming a series of posts across December, continuity becomes genuinely annoying.
An artificial tree stays identical from the day you put it up to the day it comes down. You can shoot a video in week one and another in week four and they will cut together. You can also put it up in early November, which, if you have ever had to shoot Christmas content in October, you will understand is a considerable advantage.
Shape Matters More Than You Think
Slim and pencil trees photograph brilliantly in small spaces because they fit in frame without you having to back halfway into the kitchen. If you shoot in a flat or a small living room, a slim tree is almost always the better choice.
Full traditional shapes look more luxurious but need space around them. If you are going full, leave a clear metre in front for the camera and think about what is behind the tree, because that background will be in every single shot.
Flocked and snow-dusted trees are having a real moment and they do photograph beautifully, especially against a darker wall. Just know that flocking sheds a little, so shoot before you brush up.
The Lighting Decision
This is the one that makes or breaks your photos.
Warm white lights are flattering, cosy and read as golden on camera. Cool white looks crisp and modern in person but can go slightly blue and clinical in photos, especially if your room has cool-toned walls. Multicolour is fun and genuinely hard to shoot well because your camera’s white balance has nothing stable to lock onto.
For content, warm white is the safe answer almost every time.
Use more lights than you think you need. The standard advice of 100 bulbs per foot of tree is a minimum, not a target. For photography, go denser, and push some of them deep into the tree near the trunk rather than leaving them all on the outer branches. That inner glow is what gives a tree depth on camera instead of a flat wall of twinkle.
Build in Layers
Professional stylists build trees in a specific order, and it is worth copying.
Lights go on first, wrapped around each branch rather than draped around the outside. Then ribbon or garland, tucked in and out so it weaves through the tree rather than sitting on top. Then your largest baubles, placed deeper into the tree to create shadow and dimension. Then medium ones on the outer third. Then the small ones and any filler picks to cover gaps.
Odd numbers, grouped in threes, always look better than evenly spaced single ornaments. And leave some negative space. A tree crammed to capacity reads as noise on camera.
Sticking to a Palette
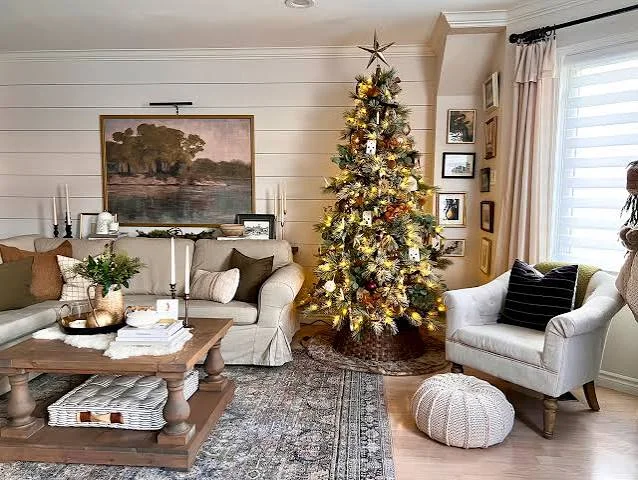
Three colours maximum. Pick a dominant, a secondary and a metallic. Champagne, cream and brushed gold. Deep green, burgundy and antique brass. Icy blue, white and silver.
Mix finishes within your palette: matte, gloss, glitter and velvet in the same colour family create far more visual interest than the same finish repeated. Matte in particular is your friend, because gloss baubles bounce light straight back at the lens.
Shopping Smart
A tree you will shoot every year for a decade is worth spending properly on. Look for a high tip count, hinged branches that drop into place, and a sturdy metal stand, because a wobbling tree in a video is very hard to ignore once you have noticed it.
Buy early. The best shapes and the slim profiles sell out first, and by late November you are choosing from what is left. It is worth having a proper look through dobbies and similar ranges in October, while the full selection is still there and you can actually choose rather than settle.
One Thing to Get Right Legally
If any part of your tree, your decorations or your filming kit has been gifted, discounted or paid for, that needs to be clearly disclosed in the post itself, not buried in a hashtag block or mentioned only in a story.
The rules are genuinely strict and they apply to small creators just as much as to large ones. The ASA publishes clear, readable guidance on how to label influencer and affiliate content, and it is worth ten minutes of your time before your first gifted Christmas post goes live.
Plan for the Whole Month
One tree can carry an entire December content calendar if you think about it in advance. Shoot the empty room before the tree goes up so you have a proper before. Film the unboxing and the fluffing, which performs far better than people expect because it is genuinely satisfying to watch. Shoot the decorating in sections rather than as one long sequence, so you have separate clips for lights, ribbon, baubles and the topper.
Then shoot the finished tree at three different times of day, because the same tree in morning light, at blue hour and late at night with only the lights on will give you three completely different moods from a single setup.
Save a couple of ornaments to hang on camera in week three, so you have a reason to go back to the tree when your feed needs it.
Mistakes That Ruin Tree Photos
Shooting with the overhead light on. It flattens everything and fights the tree lights for dominance. Turn it off.
Using flash. It kills the glow entirely and turns every bauble into a hard white dot.
Standing too close. Back up and zoom in slightly if your camera allows it, because the compression flatters the tree and blurs the background.
Forgetting the floor. A visible stand, a tangle of extension leads and a strip of bare carpet will undo an otherwise beautiful shot. A tree skirt or a folded length of fabric sorts it in thirty seconds.
Shoot It Properly
Blue hour, that twenty-minute window just after sunset, is when tree photos look best. There is still enough ambient light to see the branches and the room, and the tree lights read as genuinely glowing rather than as isolated dots in a black void.
Turn off your overhead lights. Add one soft lamp off to the side for fill. Shoot slightly below eye level to make the tree look taller. And take the photo with the lights on a steady setting, not a twinkle or chase mode, unless you want half your frames to catch the tree mid-blink.
Then put the camera down and enjoy it, because the tree is not only content, and December goes very quickly.